Showing posts with label 3D Model. Show all posts

Thursday, 28 March 2019

Major Project: Mr Plimsolls- Finessing the Skinning on Limbs and Pose Space Deformers

Fig 1: Example of Pose Space Deformer working in Shoulder and Knee of Mr Plimsolls

Fig 2: Skinning in arm following Ribbon Spines used for the Rubber Hose Rig Example 1 

Fig 3: Skinning in arm following Ribbon Spines used for the Rubber Hose Rig Example 2
Fig 4: Elbow is still able to bend naturally despite the influence from the Rubber Hose Rig
Sorting out the Pose Space Deformers onto Mr Plimsolls, I was able to give him natural movement in his shoulders, elbows, knees and hips without the geometry buckling. While I'm pleased with the final results it did take me a while and multiple back up saves to sort out parts like the knee to make sure that the other parts of the model like the shorts weren't doing anything weird like suddenly pop out when other poses in the legs happen, like raising the leg in a forward rotation.

After I was at a point where I was happy with how the model bent, I put Mr Plimsolls into a couple of poses only to see that the arms weren't flowing correctly in an arc when the elbow control and the flex controls are pull out together. So I went back into the Paint Skin Weights Tool to update the weights in the arm to allow fluid motion both when the controls are pulled separately and when they are moved together as well.

Sunday, 3 March 2019

Major Project: Mr Plimsolls Model Progress- Rigging and Skinning

Fig 1: Mr Plimsolls' Rig

Fig 2: Mr Plimsolls' Skinning

Fig 3: Example of the "Rubberhose" Rig working on skinned Mr Plimsolls 01

Fig 4: Example of the "Rubberhose" Rig working on Skinned Mr Plimsolls 02
After the Submission for the Minor Project, I went back to refine the rig on Mr Plimsolls as Alan informed me that there was some rotations in the Shoulder and Elbow joints which lead to me redoing the entire rig. While attempting to fix this issue I realised that there was an issue with the pole vector constraint when adding a pole vector to the IK Handle.

I came to the conclusion that it was due to the way that the arms were originally positioned, they were slightly sloping downwards instead of being in a strict T-pose. Just to experiment I made some standard three joint arm rigs and applied IK handles to them to find out that the reason why rotations would jump on the joints happened due to the joint placement being incorrect.

To combat this I made some slight changes to the model's geometry by straightening out the arms and placing the joints in a straighter position making sure to make the only rotations made were in the joint rotations and not the world rotation. While this helped with the IK Handle issue I had slight complications with the Pole Vectors still, However after carefully following one of Alan's rigging tutorials for Jetpack Jones I was able to get it working properly.

I had a few issues with setting up the "Rubberhose" rig too, the issues mainly involving the connections and the constraints with the ribbon spines and another issue of them causing weird rotations to happen to the joints. However after fiddling with the rig, and redo the ribbon spines more times then I can count, I was able to fix the rig so that there are no sudden rotations in the joints and the controls work with the ribbon spine without that much of an issue

Overall while rigging Mr Plimsolls as been a somewhat difficult and way more convoluted then I originally thought, I'm quite happy with the progress if made with him so far, even if the issues I've had with him as pushed me back time-wise then what I would of liked.

Friday, 30 November 2018

Minor Project: Mr Plimsolls' Modelling Progess

Fig 1: Overall view of Mr Plimsolls' Head Model

Fig 2: Mr Plimsolls' Throat has now been modelled

Fig 3: Unsmoothed overview of Mr Plimsolls' Body Model

Fig 4: Close up of Torso, his belt has now been modelled

Fig 5: Smooth Preview of Mr Plimsolls Body
Progress with Mr Plimsolls is going along pretty well, I was stuck with an issue with the back of his head and with his neck earlier in the week but thanks to Alan I was able to get the flow of the back of his head right, while also leading more geometry to the ear, as well as finding out that the hole for the neck should of been bigger. This lead to cutting away at the underside of the jaw to allow for the neck to flow much better. This has lead me with some issues with cutting down in the amount of vertices on the neck for when I connect the head to the body but it isn't so much of a difficulty issue but more of a finding a efficient way of cutting down the vertices around the neck without damaging the flow of the model's head.
Mr Plimsolls' body is pretty much all there now, I had to clean up some of the vertices on his hand because I guess that when I changed the version of Maya I was using, it moved around the geometry leading to some of the fingers in the hand to alter and look weird. After clearing that up, I finalised his belt and added some additional edge loops to the chest so that I didn't have as much work cut out for me for when I connect the head to the body, with sorting out the vertices in the neck in the head model.

Tuesday, 16 October 2018

Minor Project: Mr Plimsoll's Head Orthograph Changes

Fig 1: Front View Orthograph Differences
Fig 2: Side View Orthograph Differences
Fig 3: 3/4 View Orthograph Differences


While Modelling the mouth of Mr Plimsolls I was having difficulty with the structure of the mouth and realised that having the model smile from the get go wasn't the best idea. Therefore I went and changed the Orthographs slightly just so that Mr Plimsolls' expression wasn't so slasher smile and more neutral.


Fig 4: Mr Plimsolls before the Orthograph change


Fig 5: Mr Plimsolls after Orthograph change

I feel that changing the mouth helps the model due to the fact that more neutral one allows for more control with getting the modelling correct. With the grin the mouth was too large for the rest of the face and it just looked awkward, at least for this stage anyway.

Wednesday, 3 October 2018

Maya: Moom Pose 2

Fig 1: Moom Pose

Fig 2: Reference Image From Google

For the second week of the 5 Minute pose I feel as though my understanding of Moom has improved. I started from the pelvis and chest and worked from there and I feel as though because of that I was able to pose the character faster and in a way that fits the reference image better then how I did last time.
What I can improve on next time would be how I position the limbs and focusing on the details of the pose a little better to get the accuracy of the pose correct.

Thursday, 4 January 2018

Minor Project: Mr Plimsoll- Head Model Progress

Fig 1: Mr Plimsoll Without Nose

Fig 2: Mr Plimsoll With Nose
He still needs a clean up of his mouth and eye geometry but I wanted to fit in his nose while I was figuring out ways to go about doing his eye. In the end it looks massive and "beak-ish" but it fits in with the character he is, though I'll need to round of the tip a bit more as it looks a bit flat at the moment.

Minor Project: O'Barney Body Model Progress

Fig 1: O'Barney Without Legs

Fig 2: O'Barney With Legs
After doing two Body Models I feel like I'm getting faster in the process of making them. O'Barney's design helps make the legs easy to do due to it being one whole piece and being simple in shape. I have to say though, that because this character is the last one that I'm getting through production with I might not have him ready for the deadline, which is sad but I'll get as much as I can done of him before the 11th

Minor Project: Mr Plimsoll- Body Modelling Progress

Fig 1: Body Model 1- Clothing

Fig 2: Body Model 2- Torso Added

Fig 3: Body Model 3- Arms and Legs Added
Here is some work in progresses for Mr Plimsoll, its taking a while but here is some progression in the model. The progress for the body is going much smoother then the head, I first modelled the vest and then the torso underneath separately as it was easier to section these parts out instead of modelling them together. I did the same with the legs and shorts, as it was easier to work on the legs without the shorts getting in the way. I might change how I model the knees on his legs as they are reading of as too square for my liking.

Sunday, 31 December 2017

Minor Project: Mr Polo Modelling Progress

Fig: Mr Polo Head Model 1
Fig 2: Mr Polo Head Model 2
Fig 3: Mr Polo Body Model
The head needs some more finessing to get Mr Polo's brows and eyes sorted, I haven't quite figured out whether or not to model the hints of a mouth he has on the sides of his head or leave it for texturing, so that is also another thing on the list of things to do.

Bodywise, Mr Polo's is rather simple in comparison to the other two bogeyman due to it primarily being his coat. His feet are my main concern as I want to make sure that they aren't obscured by the coat to allow for a clean rig, so i might lift up the coat as to avoid the overlap shown in the orthographs, allowing the entire shoe from the side to be shown. If that doesn't work i might also have to consider increasing the size of the base to allow for clear back and forth movements to be shown.

Tuesday, 5 December 2017

Minor Project: Mr Plimsoll Modelling and Updated Orthographs


Fig 1: Model Before the Addition to the Orthographs

As I was in the process of modelling the head for the character of Mr Plimsolls I ran into some issues as to how to model the top of his head as I didn't feature it in my orthographs, having him wear his hat instead. This cause me some problems in understanding the head and where to put vertices so I went back and updated the orthographs to show potentially how the head would look under the hat.
Fig 2: An Update to the Orthograph
The addition is pretty basic but because I don't plan on showing the character without his hat I thought that keeping it simple was the way to go. Also I realise that the character also doesn't have a well rounded back to his skull, it lands a little short of the mark, this seems to be a common mistake I do as it also happened in the previous project I did in regards to 3D modelling and it is something that I would have to work on in future.

Fig 3: Model After the Addition to the Orthograph

 Overall I feel like the addition I made to the orthographs helped in increasing my understanding of the character in a 3D space, it does feel better having an idea of where the skull could be laid out under the hat rather then guessing. There are some things about this model that I am nervous about, like the protruding cheeks, the nose and the mouth, I feel more confident and positive in going about it.

Thursday, 9 November 2017

Maya Tutorial: Arnold SSS


Fig 1: Default al.standard Material

Fig 2: Shallow Map Added

Fig 2: Mid Map Added

Fig 3: Deep Map Added

This class practice was about applying detailed skin texture using Arnold SSS. Using Arnold made the whole process of applying Shallow, Mid and Depth maps to texture for the model was very efficient in comparison to the previous versions of Maya.

(Model Provided by eat3D)


Thursday, 5 October 2017

Maya Tutorial: Ambient Occlusion and Wire Frame made with Arnold

Fig 1: Ambient Occlusion on Model

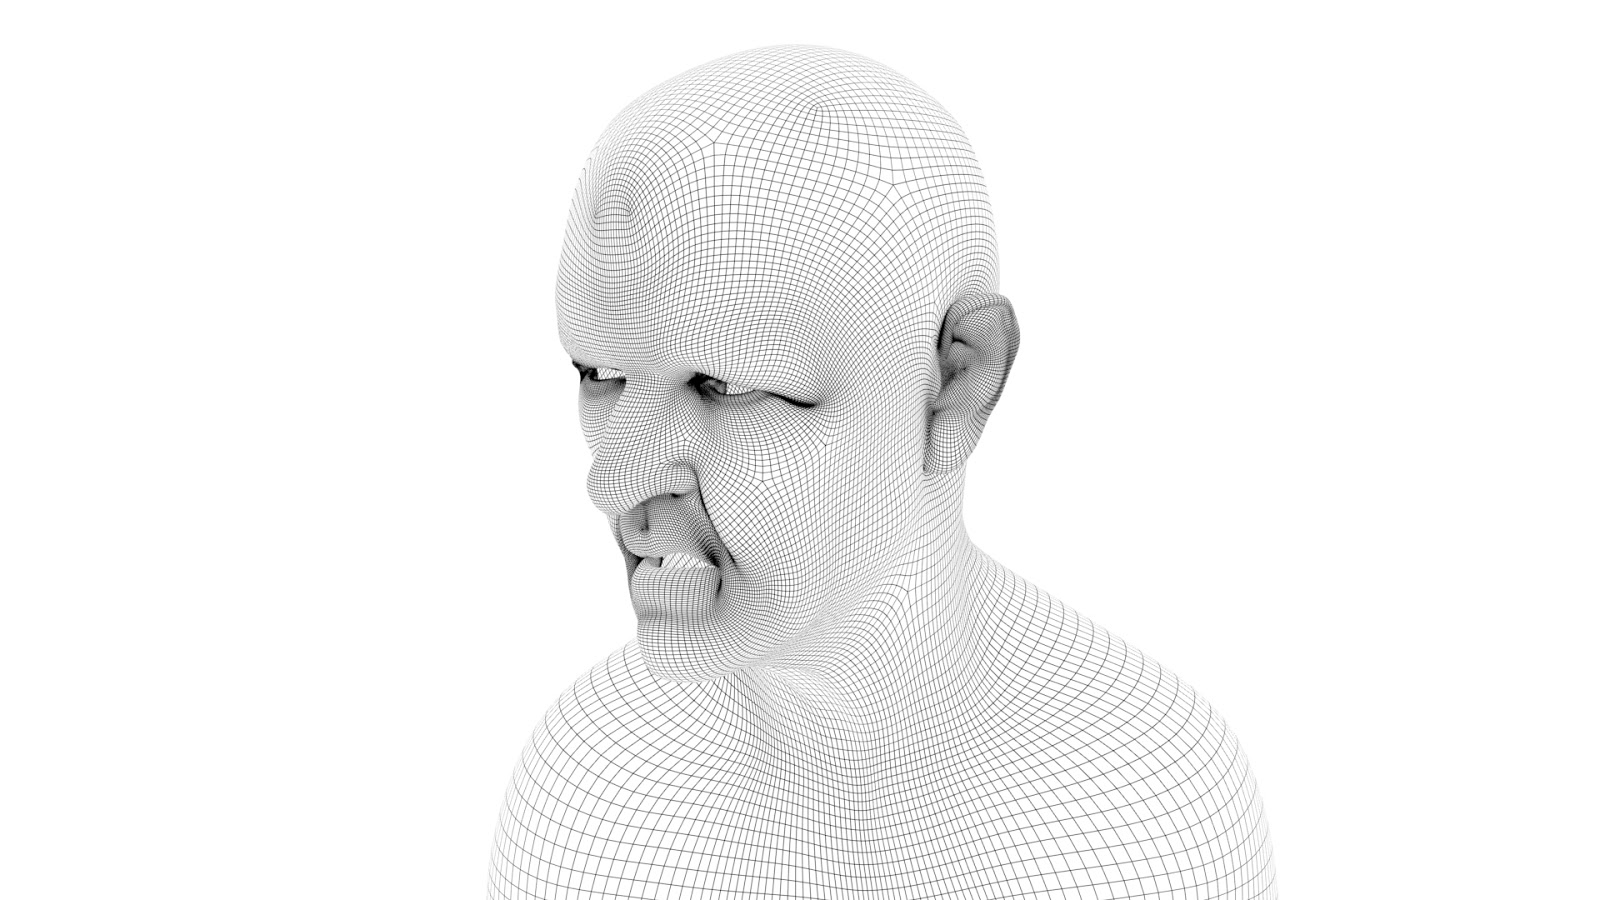
Fig 2: Wireframe on Model


Achieving Ambient Occlusion and Wireframe Renders in Maya 2017 is so much easier to achieve with the renderer Arnold. Instead of going through a long process to get these renders in the old versions of Maya with Mental Ray, with Arnold the process has been greatly simplified.

(Model Provided by eat3D)

Wednesday, 10 May 2017

Adaptation B:Texturing and Rigging


Fig 1: Ludlow's Head with UV mapping 

Fig 2: Ludlow's Body with UV Mapping

Fig 3: Ludlow textured without his scarf

Fig 4: Ludlow textured with his scarf

Fig 5: Ludlows Rig

There have been so many ups and downs modelling Ludlow, while UVing went quite well, Rigging (especially Weighting the model to the rig) had been an absolute nightmare, it was mostly on my part however forgetting some parts and trying to figure out what to do with the scarf - as I wanted it to be that while the scarf was connected to the rest of the model it wasn't weighted at all - was tough. After six tries and most of the day gone I finally weighted the model to an ok standard, it does its job which is all I can ask for after spending so long on it.
Maya on my home computers in general are very picky with me, one won't allow me to install mental ray and the other one throws a fit over batch rendering to the point that it closes the program down altogether. I'd have to restart the program again on both macs to see is resetting back to default can help in some way.

Thursday, 4 May 2017

Adaptation B: Modelling Process

Fig 1: Ludlow's Head

Fig 2: Ludlow's Body
I am almost at the stage where all of the pieces have been modelled now apart from ludlow's stolen scarf and his hair. Some aspects of his face had to be changed to suit 3D for example his eyes as I had to divert from the orthograph to allow the model to have eyelids. I might also need to go in with the relax tool again in certain areas and fiddle with the eyebrows some more so that they fit with the head better.

Thursday, 26 January 2017

Mud Box: Robot and Importing into Maya and Photoshop

Fig 1: 360 View of the Robot in Mudbox
Fig 2: Maya Render
Fig 3: Front View of the Robot in Photoshop 
In this Mudbox Tutorial I edited and painted onto a pre-made model of a robot design and modelled by Simon. Then import the model into other software like Maya and Photoshop. Importing the Model between Mudbox and Maya was relatively easy, but transitioning the edits from Photoshop to Mudbox was a little bit more difficult as it wanted to be imported in as a projection and wasn't put onto the model. Overall, however I found that the way that exporting and importing into and from Mudbox is an easy and efficient tool.

Tuesday, 24 January 2017

Mud Box: Construction of a Pumpkin

Fig 1: The Final Pumpkin made in Mudbox
Fig 2: The Making of the Pumpkin


Sculpting using Mudbox was very enjoyable, its like using clay and its interesting how the tools worked. Especially the Grab, Sculpt and Relax tools which were the tools primarily used to make this pumpkin. The potential and pros for Mudbox is obvious as the more in depth details you can go into with a model's design, especially for organic and more realistic models